This blog is Moving

This blog has changed to domain Papillon Digital Design and the new domain is http://www.papillondigitaldesign.com/

Welcome

Welcome to PapillonDigitalDesign. Hope you get inspired by the projects, videos and files. Would love it if you could leave comments and become a follower. (Word verification is turned ON to avoid spam. Sorry for that inconvenience.) Would love it if you would also share your project here . Due to the fact that the blog has moved there maybe some broken links. Please try deleting the s after designs from the broken link and try the link as the new link is http://www.papillondigitaldesign.com/ Thank you for visiting.

Friday, March 30, 2012

While coloring copic I found

Now even though I am a little bit new to copics I am not new to watercolor. While watercoloring I used to use Viva paper towels for picking up or sopping or mopping up extra watery paint. Also used sometime to lift colors and give fun effects. You can use ordinary tissue or paper towel but in watercolor unless you are careful you find that these leave fibers behind which the brush picks up. Viva is nice and thick  unlike regualr tissues and has no texture unlike the quilted paper towels.
Now a few days back I said how the bee paper got saturated quickly especially with the copic way of blending (not flicking) or while using dark colors like reds.
So I decided why not use these paper towels. (in this case ie with copics you can probably use the tissue too) to mop/blot the colors like red which float on the surface even after just a couple of layers. And I did find this worked a bit. Happy discovery.
Oh and I think I am going to settle on starting with the  medium  colors and most of the time go with flicking method to color.
Still have to ways to go before I get comfortable with copics but I like the improvement so far.
I may even start mixing media soon like bringing pencils and pastels and watrcolor pencils too.


Thursday, March 29, 2012

Learning from mistakes

As you saw I posted my final project for the created from color. I almost got everything but forgot one tiny bit. Shadow from the hat on the - forehead. Eeks! I got the hair but by the time I came to color face (which I do last I was so happy that things were going well I forgot ). Thanks to Melissa - CFC (created from color) for bringing this to my attention.
So I have corrected the image. I had to go in with a C3. Now the paper was fairly saturated already so couldn't do much. Always better to get it right the first time I guess and go with gentle touches on paper instead of pushing the color in.
Oh I found that viva paper towels do such a great job of picking up the pooling colors on paper.
I used to use this while watercoloring as this paper towel doesn't leave fiber bits on the image and it is smooth so also does not leave texture and is thicker than tissues. Well it does help with copics too.
My corrected image with C3 and then E11 added. I did not want to blend too much because of the blotching that occurs with too much saturation

The before picture for comparison


post signature

Tuesday, March 27, 2012

Dress Up

This is a image I colored for my Created from Color copic class (Kristy and Melissa) this week.
Make sure to register for their new class if you havent already done so and are interested in learning copics.
 The digi image is Dressy Kaylee from Some Odd Girls


Paper used for stamping is GinaK 's pure luxury cardtsock.
Copics used -
Greens - G28, G24, G21, G20
Oranges - YR18, YR16, YR12
For Hair  - E29, Y21, E55, E51
For Skin - E0000, E00, E11, R02
For Sand - E33, E31, E30
I also used C00 and O around the image,

No I usually do not keep track of copics used. as I just pick it up but this time I did keep track. :)

post signature

Monday, March 26, 2012

Out of all the fish in the sea - Prom

Out of all the fish in the sea - an idea for prom and as a result this card.


The card is an easel card using the easel card base from silhouette online store. And so is the paper ribbon. The words were typed on silhouette studio with a font I had and then cut with SD. I mostly use SD for print and cut. Paper for stamp is GinaK. Love this paper but you need to use double cut with silhouette on thickest setting. It is advisable to keep the cuts simple. . The fish was hand drawn and cut. The image is from Mos Digital Pencil. I have used diamond skittle. I am happy with the way I am coloring now.  I got to practice reflection too - Yeah. Sadly the stickles glitter is covering it up a bit.


post signature

Saturday, March 24, 2012

CMC Birthday Bash

Color Me creative classroom by Suzanne Dean is having it's 2nd year birthday bash and each day has some fun events one can participate in. Day 4 had this sketch challenge by Tina


So my card for that is


The image is from Mo's digital pencil called Abby celebrating (http://www.mosdigitalpencil.com/products/Abby-Celebrating.html)

Everything was print and cut using the silhouette SD. The pattern paper is a silhouette pattern.
 I am enjoying coloring. It is so therapeutic. I am getting better at folds :). Thanks for reading . Hope you do go and break out the markers and start coloring too.


post signature

Thursday, March 22, 2012

Little Rapunzel

Hello
I am a designer today on  Shes a Sassylady.
Sheila is an awesome lady and a wonderful friend.
Lately I have been coloring with copics. Still have ways to go before I am happy but here is a project made with the stamp I colored. This lovely digi stamp is from Elisabeth Bell called Little Rapunzel! I love her creations.
Here is the card .


No die cutting machine for this one - just Martha Stewart loopy punch for the border and corners and ek success retro flower punch for the flowers. Stickles ; ink; Cardstock ; (GinaK pure luxury cardstock for the for the stamp ); pattern paper;  Floral pin and some beads for the stickpin ; cake doily ; length of yellow polka dotted ribbon - 1/4" inch and a chipboard with flocked swirl (from 3 birds) and last but not the least copic markers for coloring the image. Since the card is is odd sized I had to hand make the envelope. To close properly one piece of 12 x 12 was not enough so I added the yellow cardstock to both the front and back and made it decorative and functional.
A closer look

And the inside of the card and the back of the envelope


Thank you all readers for reading this post

post signature

Sunday, March 18, 2012

Some copic coloring CMC CHALLENGE #39

I am taking both Melissa's and Suzanne's class. Love Suzanne's coloring technique.  And if you have also read my previous post you know I have become a stamp junkie.
Suzanne has a challenge once in every 2 weeks I think. I am not quite happy with my coloring yet but I thought why not start somewhere. So here is my attempt. I probably could have done a better job if I had colored on a better paper. This is Bee paper and I do not like it very much. Prefer Ginak to this. I also need to try out the cryogen paper which I will be getting soon. But I had already printed out the digital image and so went with it. The reason why I don't like Bee that much is after just 2 layer of coloring the paper refuses to accept more ink and starts becoming blotchy. It does not soak through but it does not help in blending. In this image I had go and to choose to color in red which needs more blending didn't I? Lol.
Anyway here is the card I made. One always needs to keep the early images as one can later compare how far one has improved! So here is the card without much adieu


I like the skin and hair but I should focus more on folds.
Now both these coloring was done under pressure I should say. I had a guest who wanted me to show her how I color in front of her. I told her I am a newbie but she insisted. Here's the other. I made that into a bookmark later for her


The first image is a digital stamp by SomeOddGirl called Flower Girl Mae
And the 2nd one is stamp by Suzanne Woolcott Gorjuss girl - goth girl.


post signature

Wednesday, March 14, 2012

Karadaiyan Nombu

Today is Karadaiyan Nombu. It's a festival celebrated by Tamilians (South Indians) for the well being and long life of husbands. The time or date is when there on the transition between the Tamil months Maasi and Panguni. During a particular auspicious time during that day the woman takes a head bath and then makes a particular type of sweet called the adai or kozhakattai keeps it with unmelted butter in front of god and ties a sacred yellow thread around her neck. This is also done by kumari's ie young unmarried girls (for their future husband) .
This is done as it is believed that on this day Savitri snatched her husband Satyavan back from Lord of Death - Yama with her cleverness and her vratha (ritual ) (by which she could see Lord yama) - More of the story can be read at http://en.wikipedia.org/wiki/Savitri_and_Satyavan
So woke up early today as my mom told I have to do all this by 7:30 AM
Preparing the kozhakattai or sweet adai took some time
I roasted the rice flour and then roasted the some black eyed beans and boiled the beans. Then melted some jaggery in microwave and then in a pan added the jaggery water and then the roasted rice flour , some shredded coconut , crushed cardamom and the beans and stirred till it formed a dough. Then allowed it to cool and then formed it into balls the size of lemon and flattened them and steamed them like we do for idli in a pressure cooker. Then kept these along with the some fruits , butter in front of god - prayed  saying these words "Urukaatha vennayum oradiayum naan nootren, orukaalam en kanavan piriyammal irukkanum" (which translated means I kept unmelted butter and one adai and tied the thread, always my husband should not be separated from me ) and then tied the yellow thread.
post signature

Tuesday, March 13, 2012

Stamp Junkie

I have become such a stamp junkie. I blame it on Suzanne J dean and Melissa from Melissa Made and Kristy (whose classes I have been taking). Looking at their blogs and watching them color - Have to try that technique out.
And as many of these places have digi's instant gratification. I already knew some places like mo's digital pencil and susana's custom arts and designs, sweetpeastamps, someoddgirls 7college funds, simonsaysstamps, tiddly inks and bugaboo. But new places I found - allthatscraps,I brake for stamps, stampin scrappin, phindy's place, simply bettey's, kenny k (ooh the ladies on here - also check out braz's coloring pages for some  girl images to color ), sassy studio , paper shelter, fred she said and funkykits (sugar nellie stamps).
Of course dont forget you can get tons of images when you google for coloring pages and digi images. Some of my favorite digi's are from sliekje and annabodil.
I tend to start after I finish one round of watching so I have now watched one round of suzanne dean's videos and kristy's and melissa's videos. So now the coloring begins. I might post if they turn out ok. If they are deplorable!! then it will end up in trash can :)
post signature

Monday, March 5, 2012

Watercolor painting by my teacher/instructor

As I was browsing I found this link - http://kevindaniel.x10.mx/california.html.
He(or She ) has a picture from my instructor in California from whom I learnt watercolor. She was so talented and even more such a great instructor. Those classes are the main thing I miss after moving from California. To see the picture click on this link - http://kevindaniel.x10.mx/california.html
Seeing things like this makes me realise that with me into copics and I am sure very soon I will be back into watercolor painting - I have almost come full circle. I deviated from the path when I took up papercrafting to check out colors in my painting. One of the thing we are advised to do is to check papers - pattern papers to learn how colors mix and what effect they get. I somehow ended up with a cricut and then gypsy and Oh Girl! What an Adventure! I guess I took the long route and now I am almost back on path!


post signature

Sunday, March 4, 2012

Copic Classes

Copics.
I am having fun learning Copics. Both at Melissa's and Kristy's and from Suzanne J Dean. I prefer to color dark to light and so so happy to see another person doing the same.
Over the weeks I will try to post my coloring efforts. So I can keep track of how I have improved.
Also waiting for certification classes to come to Houston. I really want to take that one.
It is so nice to see friendly faces in both the classes I am taking. It makes the learning process more Fun!


post signature

Friday, March 2, 2012

Cup Cake ....

..Wrapper Flowers :)

Ahh my mouth watered there for a moment too when I said cup cake .
Hello - This is Pam fromPapillon Digital Designs & The Bug Bytes today as a designer on She's a Sassylady. Thanks Sheila for having me on in your lovely design team.
I had recently been to a scrap meet where we each added a few items to a goody bag. I made some flowers and one type was cupcake flowers. They are very simple to put together and make a lovely embellishment on a card.
Here are some


I have used 1 regular cupcake wrapper and 2 mini wrappers to make these flowers. You can use the white ones (2nd flower) and ink the edges or use decorative wrappers (1st one) to make the flowers.

Here are pictures of the various steps in the process.

I have used sharpie to show where to cut but you can eyeball and cut.
Fold the wrappers into quarters as they are easy to cut and saves you time too. Also you can cut the circumference to layer well


As you can see above I had to cut down the large one and 1 mini so that they can progressively stack together nicely


You have to cut the line almost to center. Do not cut completely or you will be left with strips


Since you have folded in quarters you have to cut the side (on one side you have to cut once and on the other twice in each slit as shown in the picture above and below)


Then cut the lines. You can leave it like that but I like to kind of round off the petals so


Opened up they look like this


After you cut all the 3 you can ink them if you want and then stack them and add a brad or decorative button to the center..

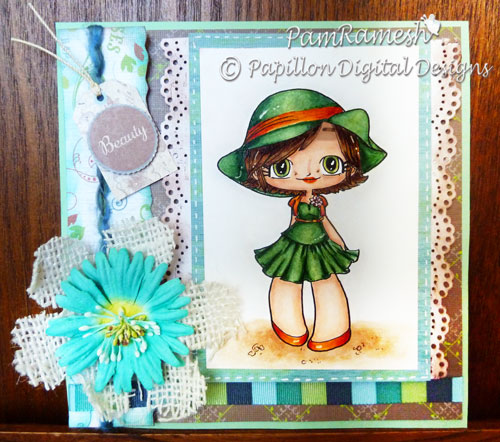
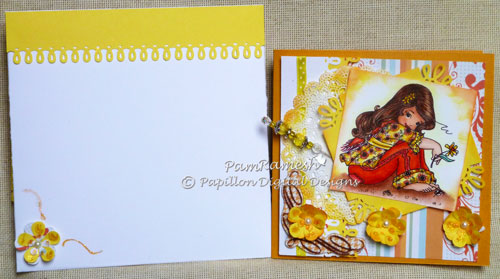
Here a simple and fast card I made with the flower. I have used ric rac, candi dots (brad like dots without the pin portion) and 1 small cake doily which I cut apart to use on front and the inside


Aren't they easy to make? Can't wait to see you make  and decorate them.
Thanks for reading this post and thank you sheila for having me here today.


post signature