This blog is Moving

This blog has changed to domain Papillon Digital Design and the new domain is http://www.papillondigitaldesign.com/

Welcome

Welcome to PapillonDigitalDesign. Hope you get inspired by the projects, videos and files. Would love it if you could leave comments and become a follower. (Word verification is turned ON to avoid spam. Sorry for that inconvenience.) Would love it if you would also share your project here . Due to the fact that the blog has moved there maybe some broken links. Please try deleting the s after designs from the broken link and try the link as the new link is http://www.papillondigitaldesign.com/ Thank you for visiting.

Tuesday, June 21, 2016

Thank you Card

I love the kraft card base and envelopes from recollections (Michaels). Having the card base makes it so easier to make quick cards.
 Here is a picture of "Thank you" Card I made recently for my friend .


The image is a digital image from Debbi Moore. It's cut out using the scan n cut. The flowers are from Tattered lace Flowershop. I colored it simply using copics
The barbed fence is from My favorite thing. The lattice is spellbinder expandable fancy lattice.


siggy photo 96c7330f_zps4cf3aab8.jpg

Thursday, June 16, 2016

Graduation card

My son graduated this year and I made him a simple quick card.


I used Darice embossing folder for embossing the silver miri board and a cricut embossing folder to emboss the black cardstock. The stickers are all from Jolee's Boutique. It is a quick card to make. Ready in a jiffy


siggy photo 96c7330f_zps4cf3aab8.jpg

Friday, June 10, 2016

Anniversary Card

This was a card I made for my wedding anniversary a couple of months ago.


I played with the Tattered lace melded dies. I just love these dies. They have texture frames everything built in. This one is the melded roses I think.
I just colored in the roses with my copic. I cut out the sentiment with a spellbinder labels die . Sentiment was printed out using photoshop. Popped up the melded layer with foam dots. Added a lace trim and placed the sentiment die cut in the center. Some roses and bow to finish it up.

Made a matching envelope. I have shared how I make envelopes in one of my previous posts I think. But essentially what I do is fold up computer paper around the card (after leaving a margin of about 1/8" or 1/4" ) as much as I want at the bottom and about half to three fourth inches on both sides. In most cases the top won't be enough and so it most probably won't overlap to close. To make up for this I cut a piece of paper that matches up the card to the height I need for overlap plus some so I can punch or die cut a beautiful edge. Then paste that so that I can finish up the envelope.

Here is a picture of that and I also have added the same picture as pdf file under misc tab called "pdf  for envelope template" so that you can download and print it out if you want.
Note that is not to dimension but just a reference

Hope you liked the card. Thanks for reading.


siggy photo 96c7330f_zps4cf3aab8.jpg

Monday, June 6, 2016

Happy Summer - Lawn Fawn


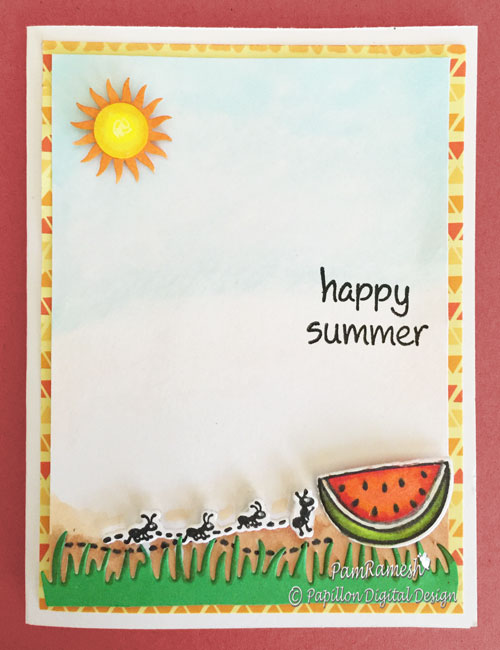
Today I made a simple card for summer for Design with Sassy facebook group.
Theme - Summer or using Sun.


I have used Lawn Fawn set "Happy Summer" ( Ants , watermelon and sentiment).
The grass is impression obsession die I think. The sun was a circle punch and Mcgill flower punch combined together. Used copics to color them all. Hope you all play along . If you do make a card please link up the blog post in comment below and the  design with sassy facebook group.

siggy photo 96c7330f_zps4cf3aab8.jpg