Especially with the new cutter when I try to convert dover jpg images from the cd to cuttable files - svg - just trace - expand and if there are open gaps or very thin lines - use the blob tool. (I usually trace while choosing the tracing options set with white not chosen)
I have the knk but remember in Ai to svg you need the fill set to color while the stroke should be 0 pts. So I alternate between the two while correcting and when I am happy I make most usually compound paths out of it - make sure the fill is set and the stroke is set to (no stroke) or 0 pt.
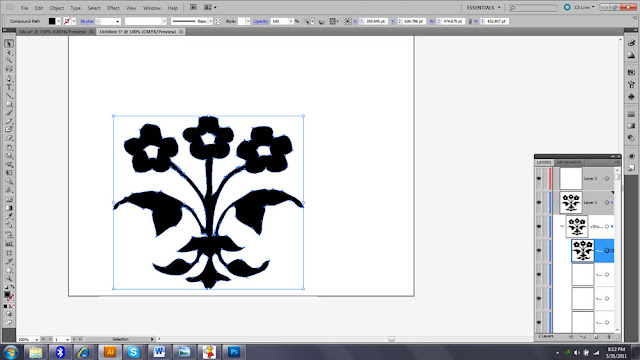
I just thought I would add some pictures to show what I was talking about. Here's the picture of a traced ai file. Note how the image is broken in some places of stem. So if I need to join I can manipulate the nodes in knk studio or older illustrator.
But if with cs5 it makes it so easy
So after using the blob brush and connecting I make sure I drop down or twirl open the layer and choose the particular layer I want which is the completed image
I then move the layer to a new layer (not necessary to do this way you can directly delete all the other layers but I like to do it this way) and then delete the other layer
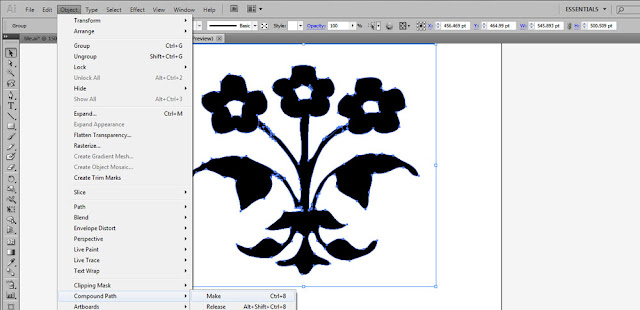
After that I select the image and make a compound path
And then I make sure I fill it with color and set the stroke to none
In the beginning after tracing I usually like to set the artboard to 12 in by 12 inch. After all this I save the file as both ai and svg. Then I sometimes take it to either knk studio or MTC and play with it there like adding a card welding etc
for eg this is a image I traced from dover ornamental fixed it and saved as svg
Then I took it to knk and made this square card
So I hope these images helps someone a little


No comments :
Post a Comment
Thank you for the time and effort you take to leave your kind and encouraging words and comments.