This blog is Moving

This blog has changed to domain Papillon Digital Design and the new domain is http://www.papillondigitaldesign.com/

Welcome

Welcome to PapillonDigitalDesign. Hope you get inspired by the projects, videos and files. Would love it if you could leave comments and become a follower. (Word verification is turned ON to avoid spam. Sorry for that inconvenience.) Would love it if you would also share your project here . Due to the fact that the blog has moved there maybe some broken links. Please try deleting the s after designs from the broken link and try the link as the new link is http://www.papillondigitaldesign.com/ Thank you for visiting.

Saturday, January 21, 2012

When faced with a ...

"When faced with a mountain, I will not quit! I will keep striving until I climb over, find a pass through, tunnel underneath or simply stay and turn the mountain into a gold mine, with God's help.”
                                                                                                                   - Robert Half


Hello Readers
This is Pam from Papillon Digital Designs. Thanks Carolyn and Allison for having me on today.
Today's project challenge is doing "Something New/Something inspiring"
I love the above quote as it is especially apt today as not only am I doing a Layout which is not in my comfort zone but my layout subject is Mine - Independence Mine - Alaska.
My layout is an interactive-spinner layout.  I was inspired by hot of the press spinner template. But I did not like the heart and oval shapes that came with. So decided to use cameo for making my own.
Here is the layout


Now I will be garrulous and try to explain both how and why I chose to do what I did as I go along.
First thing I did was make a silhouette file


The white spinner wheel is cut as a template so that you can put a brad and then turn it to mark the frame for the photos on the actual spinner wheel. The frame on the spinner is 1/4 " lesser than the opening on the layout to give it a mat effect ( I used 3x2 photos so the opening on top is 3-1/4" x 2 -1/4". Now these pictures will maybe show what I am talking about better.


So after you come to this stage just attach a foam to the spinner. Make sure if you are using foam dots/pop dots to dust the outer side with powder so that it does not stick to the top of the layout for then it will not spin. Then using a brad assemble the layout.


Now my choice of papers. Since the pictures were more of blues I decided to use a red orange pattern to give a contrast to the pictures. I also decided that the plaid design will kind of give a solid feeling as the subject matter is a Mine. That's why I did not round the corners too. But I needed some curves though not dominant but as an accent. So I decided to make a kind of mountain pattern on another pattern paper. Now for the embellishments. I took some of the pictures itself and traced it on silhouette studio and cropped it and did a print and cut. I also took some gold coin and silver bar images from online and did the same. I did not find a gold dust bottle souvenir image so decided to make my own using some circles and rounded square. After cutting them out with cameo then for the first time I took out my yourstory and then using a scotch hot  laminating sheet from walmart  - laminated all the cut outs. Gives it a nice sticker effect as I did not want to use glossy accents. Then I tool perfect pearls and with some water (for setting the perfect pearls) and brush applied some gold copper and silver color to get a nice shine in some areas. They look lovely at an angle. I also cut some trees and stickled the tree and the title. Then I used a Martha Stewart triangle punch (which I had got from walmart way back) for border and then attached a gold ribbon (Costco) to it. Some metal flowers and leaves and suede leather bows completed the rest . Here is a closer look at the layout. I still have to fill in the journaling on the white strips


The interactive part when you spin the wheel (of course you have to cut  a slit in the page protector so that you can spin and maybe also add an arrow and words spin so that the viewer can spin it to see the rest)


So today's challenge on do something new is to do a card or layout which is interactive - be it a spinner like this or an  accordion fold or a hidden tag. One good resource other than the web of course is the Book - Magic by Jeanette Lynton.
Thank  you all  for reading

post signature

Copics Class

My dear friend Melissa from Melissamade along with Kristy from TheOddGirl.has a copics online class opening soon. Limited people so if you want to join do hurry


click on the picture or click here http://www.createdfromcolor.com/ to check out the site in case you want to  register

post signature

Registration marks in Silhouette Studio

If you have both the Silhouette sd and Cameo like I do and like to use Sd for print and cut be very careful when it comes to registration marks unless you want to waste paper.
Make sure you have the marks set to silhouette sd as they are different in auto feature and cameo


post signature

Tuesday, January 17, 2012

Exploring Fill Feature in Silhouette Studio

Hello everyone. I promised my friends that I would more of silhouette studio videos. So today let's explore the fill feature in SDS. I have used the designer version as that's what I have and I highly recommend that is you can afford it and can find a discount to go for this as it opens up so many more fun features like opening svg files, cool sketch option and the knife and eraser and ruler. Without much adieu here is video


post signature

Monday, January 16, 2012

Great Outdoors

I have started doing more layouts - my new year resolution.  I had got wildlife cricut lite cartridge in hopes that one day I would scrap my Alaska album so I decided to make use of it. Ohhsnap - hope you are watching as you were the one who pointed me in this cartridge's direction as soon as I came back from my trip.
Here's my layout


Supplies Used.
Cricut Cartridges - Cricut Lite Wildlife, Hello Kitty font, Cursive 101.
Gypsy for welding letters
Paper - DCWV The Green stack, Shimmer Stack, Recollections.
Martha Stewart Punch - doily lace edge.
1 inch circle punch
Glue - zip dry, Xyron, foam dots.
Inkjet transparency
Paw print image of Moose, Bear and Fox.
Felt decoration from 3 Birds
Cake doilies
Glimmer mist

Bling.
Method:
Choose coordinating pattern paper and solid cardstocks. Mat the photos. Photos used are 5x7, 2.5x2.5 & 3 - 3x3 photos). Cut moose and bear at 3.75 inches and cut 2 types of fox at 2.75inches from the Cricut Lite Wildlife cartridge. Cut away the puppies from one of the foxes. Use Gypsy to weld Title. Words Alaskan and Crossing are welded from Hello kitty font - rounded letters - cut at 1.75 inches. Outdoors is welded and cut from cursive 101 cartridge - cut at 1 inch. Print paw prints at about 0.8-0.9 inches each on transparency. Also prints out a sketchy road with paw prints (I used Adobe Photoshop). I glimmer misted a cake doily and also cut a circle out of pattern paper for center of the doily to layer. Assemble the layout & add embellishment.


post signature

Sunday, January 15, 2012

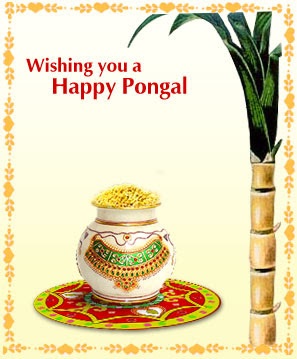
Happy Pongal

Wish you all a Happy Pongal


Today is our festival called Pongal.
It is like thanksgiving - a harvest festival. when winter moves on to spring people celebrate making a special dish called pongal . Now pongal can be both a sweet dish and a salty dish both made from rice and lentil (moong dhal). The sweet dish in addition has jaggery and milk.  So during this time - a particular auspicious time (checked from the calender called the panchangam) a decorated pot or vessel(decorated with turmeric, kunkum, and sugar cane and turneric root tied with yellow thread) is kept with milk and boiled. "Ponga" means boil and overflow. When the milk boiled over people in the house shout pongal and add sound/noise effect by banging metal plates and spoon. My son loves this part  of it. Then the boiled rice and lentil mixture is added along with jaggery and then lastly ghee (clarified butter which we use in almost all sweets). We also make a regular version of pongal without milk and jaggery but add salt and ground black pepper and cumin seeds and ghee. Then as with all festivals an added fried dish is vadai - ( ground urad dhal & a couple of green chillies and salt.)
You can read more about pongal here - http://en.wikipedia.org/wiki/Thai_Pongal
Once again "Wish you all a Happy Pongal"


post signature

Friday, January 6, 2012

Happy New Year card

Hello Everyone,
This is Pam from Papillondigitaldesigns & TheBugBytes. I am the sassy designer for the day at She's a Sassylady. Thank you Sheila for having me share on your blog.
I want to wish you all first a Happy New Year.
I have been crafting a  bit lately - yeah! I have been busy making flowers and embellishments and scanning to digitize my photos. But for today I will just share a card with you since it's just 6 days past new year.
I used the silhouette for this project with some of their lovely echo park patterns. But the main image the sand clock is an svg file I created and is available at papillondigital designs.
Here is the card


( Just had to slip in the flowers didn't I ?;) )

Funny how the hand (tim holtz brad mounted on button)- shows about an hour before 12:00 :) . It was on time lol but now guess it should point the other way.

And the inside of the card


A peek at the silhouette file


It is so simple except for a bit of cutting with the knife on the clock you can cut out everything with a scissor. In fact as my mat was not tacky enough and the file was broken up to 2 pages and more that's what I ended up doing!
The inside of the paper was white and I wanted some color so I used dewdrops ink and smushed it on the paper using the dabbers (I love the finger dabbers). Then I had some brown ribbon with snowflakes on then which I think I got from archivers. I glued it on using fabri tac.
Added glossy accents to the sand clock to get that glassy/stickery effect.


You may note that the svg file looks a bit different as you can cut layers in that. In this I just used the advanced fill option in silhouette studio to get a transparent effect while printed. I used the dimensional glue dots for layering. With that you don't need pop dots/foam dots.
The view of the button with a Tim Holtz clock hand brad stuck in it.


So that's my new year card. Thank you for reading.
And Wishing you all a Happy New Year once again


post signature

Thursday, January 5, 2012

And the Winner of New year Blog Candy is

And the Winner of New year Blog Candy is

Michele from MS said...

I just got my Grand Caliber for Christmas and have NO dies yet! Thanks for the chance to win!! Wishing you and yours a New Year filled with love, laughter and lots of wonderful memories~~~
msmith38652@gmail.com


CONGRATS MICHELE! I am so happy that you got a Grand Calibur and so can play with the nestabilities.  I have sent you an email. Please try to contact before 12th thursday 2012 Michele

post signature

Tuesday, January 3, 2012

Sketch 4

This New Year my resolution is to digitize my photos and do some layouts.
I thought I would be finished scanning photos but I still have some ways to go. Just when I am finished with one bunch another crops up.
Anyway when I took some break I decided to play with sketches. I know there are tons of there but somehow when I get a photo in hand I go into freehand mode . so I thought I would try making sketches and see if I can work with them. Well here is one more sketch. You can substitute 2 - 3x 3 for 3x 6 (as one of my lovely designer's Jen did on thebugbytes yesterday -  http://3catsandabug.blogspot.com/2012/01/pams-sketch.html & http://www.thebugbytes.com/2012/01/pams-sketch.html  . Thanks Jen for playing with my designs)

Here's Sketch 4


I would be so happy if you would link your projects if you do play with my sketches. The linky  will be right below this post.


post signature